Bloomer Bread: Your Ultimate Baking Guide
Bloomer Bread, with its exquisite taste and simplistic beauty, exudes a charm few can resist. This delicately detailed bread incorporates a touch of honey, imparting a hint of inherent sweetness to its flavor. Boasting a simple list of ingredients, it remains an incredibly accessible choice for aspiring bakers and seasoned bread makers alike. With its eye-catching presentation and delectable taste, it’s no wonder Bloomer Bread is a favorite amongst many!
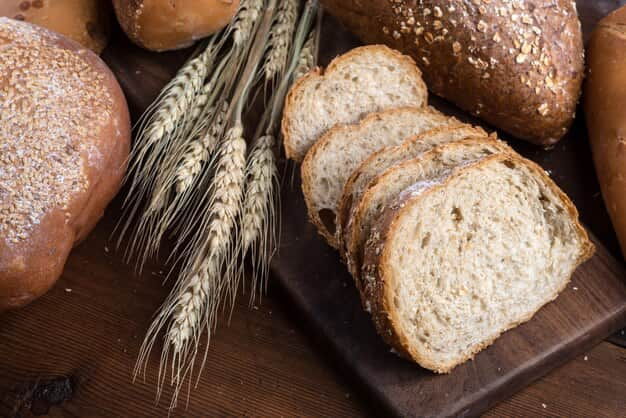
Bloomer Bread owes its interesting name to its baking process. As the dough bakes, it “blooms” or expands, thereby living up to its name. Widely favored in England, the typical Bloomer Bread is elongated, carrying round ends that further enhance its distinct look. Encased within its thick crust lies a soft, pillowy interior, creating an enticing contrast. The top of this artisan bread is often adorned with multiple diagonal slashes and a light dusting of flour. There’s plenty of room for personalization here, making it a canvas for creative bakers! You can tweak this splendid bread recipe to mirror your taste and style.
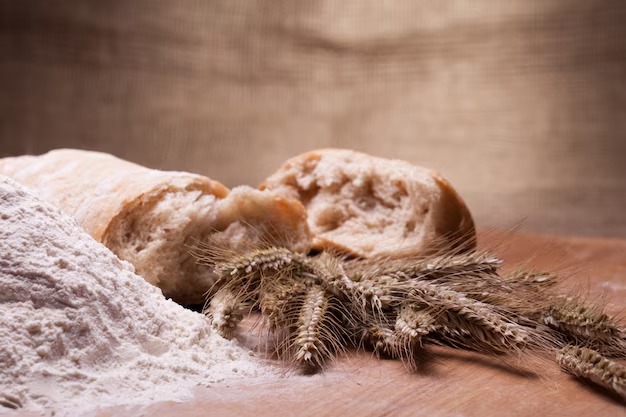
The ingredients list for Bloomer Bread is refreshingly simple and straightforward. The simplicity of ingredients translates to a cost-effective, easy-to-assemble recipe. While its uncomplicated nature might make it an excellent choice for beginners, seasoned bakers can turn it into a masterpiece by modifying its shape, adding an array of flavors, experimenting with toppings, or adjusting the crust’s color. This adaptability makes Bloomer Bread a versatile choice on any baking agenda.
Exploring the Ingredients for Bloomer Bread
Unbleached All-Purpose Flour:
For this Bloomer Bread recipe, we veer towards simplicity. Thus, we opt for unbleached, all-purpose flour. There’s no need to explore specialty flours or bread-specific options. Our goal is to keep things straightforward and approachable to all, regardless of experience level.
Yeast:
Regardless of whether you prefer rapid rise or active dry yeast, the recommendation remains the same. Begin by adding the yeast into warm water to activate it before incorporating it into the mix. Using products like Saf Instant Yeast, which are popular for their efficacy, can yield excellent results. Activated yeast allows for moisture-rich dough right from the start compared to dry yeast addition. It’s essential to ensure the yeast is fresh and functioning correctly for the best results.
Water:
Seemingly insignificant yet profoundly impactful, water is a crucial ingredient in bread-making. Some recipes may call for milk, but in this simplistic Bloomer Bread rendition, we rely solely on water. Remember to use warm water while adding yeast. However, avoid using hot water as it may kill the yeast, impairing its ability to leaven the bread.
Sea Salt:
This ingredient plays a crucial role in enhancing the bread’s flavor. Insufficient salt can lead to a lackluster taste. The right amount of sea salt not only boosts the bread’s taste but also accentuates the honey’s sweetness.
Natural Honey:
Bypass the granulated sugar. Natural honey imparts a lovely richness and inherent sweetness. If you prefer, you may substitute honey with white sugar. However, the unique taste honey imparts is a delightful addition to the bread. Remember, if you opt-out of using honey, you may need to increase the water measurement slightly to maintain the dough’s moisture.
Olive Oil:
Olive oil acts as a silent yet significant contributor to bread making. It contributes to the bread’s rise and the interior’s softness while aiding in forming a crispy crust. Use a quality extra virgin olive oil for the best results.
Crafting the Perfect Shape for Your Bloomer Bread
Shaping your Bloomer Bread is not just a matter of convention; it can significantly influence your bread’s role during mealtime. Whether serving as exquisite dinner bread or hosting layers of sandwich fillings, the shape of your loaf is paramount.
Traditionally, Bloomer Bread is shaped into an elongated form with rounded edges. However, this does not restrict the baker’s creativity. The shape of your loaf is entirely up to you—circle, rectangle, or any other form that appeals to your aesthetic sense.
One of the popular shapes amongst bakers is a broad, flat circle. A circular dough that spreads more horizontally than vertically produces pieces perfect for toast and sandwiches. This shape also ensures that your bread will have a consistent thickness, resulting in uniform slices.
However, keep in mind that the dough’s proofing time plays a vital role in determining the final shape of your Bloomer Bread. Under-proving the dough may result in a compact loaf, unable to rise properly in the oven, leading to a denser baked bread.
On the flip side, if you allow the dough to over-proof, the bread may appear flatter and softer. This over-proofing also leads to a more open-textured bread characterized by larger air pockets. Though visually appealing, these extensive air pockets may not fare well when used as sandwich bread as the fillings might seep through.
Crafting the Quintessential Crust for Your Bloomer Bread
There’s something unequivocally enticing about the perfect crust in a loaf of bread—the delicate crunch as you bite into it and the aesthetic appeal of its golden-brown hue. Achieving this exquisite crust on your Bloomer Bread involves a few strategic steps, each contributing to the crust’s texture, color, and flavor.
- Olive Oil: Adding olive oil to your dough is a sure-fire way to endow your crust with a delightful crunch. Its inherent properties contribute to a crisper crust, enhancing the overall bite and texture of your homemade bread;
- Water Tray: Perhaps the most crucial step to attain a darker and crispy crust involves incorporating steam during baking. To do this, simply add a tray of water to the bottom rack of your oven before baking the bread. The evaporating water generates steam, which, in turn, helps achieve a gloriously crispy crust. The amount of water added can influence the crust’s final color—a trifle more water typically results in a lighter crust;
- Tenting and Rack Position: As your bread begins to brown, lightly tent it with a piece of foil to prevent it from darkening further. Optionally, you could also bake your bread on the oven’s bottom rack to ensure the base bakes evenly, while preventing the top from burning;
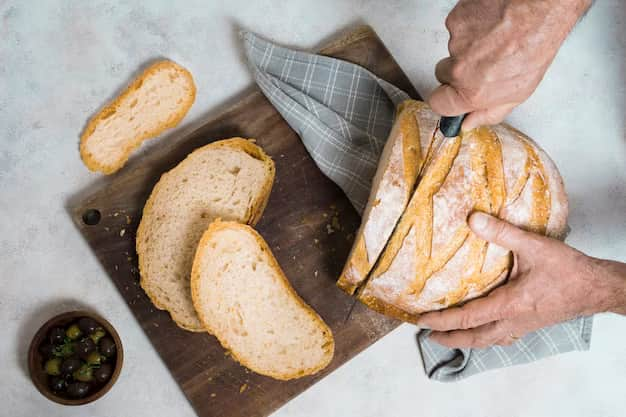
- Scoring and Crust Color: Scoring your bread can result in a lighter-hued crust compared to an unscored loaf. The technique you choose depends on your personal preference;
- Convection Oven Considerations: If you’re using a convection oven, achieving an evenly baked loaf might prove slightly challenging. Depending on your bread’s rise, you may need to tent it during baking to prevent burn-through;
- Toppings: Toppings like seeds, nuts, and oats can add wonderful flavors and textures but keep a keen eye on them during baking to prevent burning. If they begin to darken too much, simply tent the bread to protect the toppings;
- Final Flourish: After the bread has gone through its second rise, give it a light sprinkle of water and dust it lightly with flour to finish. This extra step gives your loaf an appealing finishing touch.
The All-In-One Guide to Making Homemade Bloomer Bread
A warm loaf of Bloomer bread is a versatile and delightful addition to any meal. This comprehensive guide takes you step-by-step through the process of crafting your own Bloomer bread from scratch.
Essentials for your Bloomer Bread Recipe
The ingredients you’ll need to whip up your Bloomer bread are:
- ¾ cup of water plus an extra tablespoon;
- 1 ½ teaspoon of yeast;
- 2 ¾ cups of high-quality flour;
- 1 teaspoon of sea salt;
- 2 tablespoons of honey;
- 2 ¾ tablespoons of oil plus a little more to drizzle and knead.
Step-by-Step Bloomer Bread Baking Instructions
- Initiate the yeast activation process in a small bowl using warm water. Let it sit while you prepare the other ingredients. This step remains essential regardless of the type of yeast you use;
- Blend the flour and salt in a large bowl. Introduce the honey into this mix. Use your fingers to dissolve any honey clumps to ensure it’s evenly distributed;
- Incorporate the oil into your mix. Continue to work it until it forms into a ball;
- Use a drizzle of oil on your workspace to knead the dough for 5-10 minutes. Initially, the dough may be sticky, you can add 1-2 teaspoon of flour, but refrain from adding too much. The dough will eventually smoothen and possess an elastic texture with continuous kneading;
- Cover your dough with a clean tea towel and let it sit and rise for about an hour. It should double in size;
- Preheat your oven to 425°F;
- Empty the dough onto a lightly floured surface and knead for around a minute. To do this, stretch out the dough and fold it in half towards you. Rotate a quarter turn and repeat for one to two full rotations;
- Pick your baking surface (cookie sheet, baking stone), lightly coat it with olive oil, and transfer your dough there. Mold it into your preferred loaf shape and ensure the ends are neatly tucked under;
- At this point, if you wish to include any optional toppings such as seeds, nuts or oats, now is the perfect time to add them;
- Scoring the loaf is optional. If you choose to do so, cut 4-5 diagonal slashes into the dough using a bread knife or a very sharp blade. Ensure the slashes are spaced apart adequately;
- Let the dough rise for an additional 20 minutes, but make sure not to over-proof it;
- Lightly sprinkle water and a dusting of flour over your loaf. If you’ve opted for other toppings, skip the flour;
- Set a tray filled with a small amount of water (about a cup) on the oven’s lower rack.
The Baking Method
Bake your bread at 425°F on the middle rack for 25 minutes. Then, reduce the heat to 400°F without opening the oven for an extra 10 minutes.
For a lighter crust, you can decrease the initial bake time to 20 minutes at 425°F and extend the time at 400°F. Optionally, you can bake on the lower rack with similar time settings for a lighter crust. However, do not use a water tray in this case.
It’s essential not to be deterred by a dark crust; it’s a sign of a delicious loaf rather than a burnt one.
Convection Oven Baking
Convection ovens do not support water trays, making the resulting crust slightly different. Bake at 425°F on the bottom rack for 5 minutes uncovered. Then, cover with foil for the following 20 minutes. Finally, reduce temperature to 400°F and bake for an additional 10 minutes.
Noteworthy Tips & Suggestions
If you choose to forego the honey, increase your liquid by an additional teaspoon. The dough should be slightly sticky but never dry. Continue to add oil during the kneading process.
Conclusion
In the realm of baking, Bloomer Bread represents a delightful fusion of simplicity and nuanced techniques. Its journey from a simple dough to a beautifully baked loaf is testament to the intricacies of baking science and the joy of creating something entirely from scratch. Whether you’re a novice baker or a seasoned one, Bloomer Bread offers an engaging, educational, and ultimately satisfying baking project. As you master this, you’re not only left with a delicious loaf of bread but also a deeper appreciation for the rewarding process of home baking.